This tutorial helps you to understand and start using one of the powerful features of the product -- domains.
Stage 1. Examine tables and columns
Stage 3. Attaching domains to columns
Please note:
The database diagram, which we develop in this section, is placed in the tutorial-second-diagram.mdd in the Samples directory in the program installation path.
Stage 1. Examine tables and columns
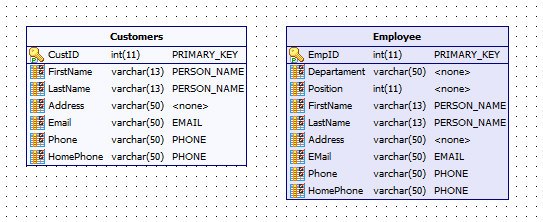
Let's look at a sample situation. We have the Customers and Employee tables:
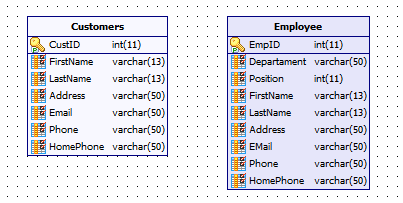
As you can note they have a few similar columns - for storing person names, e-mails, phones and so on.
Similar columns have the same data types because they are intended for storing similar data.
What will you do if you recognize that 13 chars are not enough for storing last and first person names in your system? And what if some of e-mail addresses do not fit into 20-chars field? Then you will have to change the incorrect column data types for each table.
On the next stages we will show how to simplify this task and how to create columns with predefined parameters quickly.
The domains are user-defined types, which contain all column information (data type, key options, dimensions, and flags). They allow you to add and modify existing domain-based columns quickly. Currently domains are not supported by MySQL, so it is a Database Designer for MySQL extension to the server.
To create and manage domains select the Diagram | Domain Manager... menu item. You will see the Domain Manager dialog:
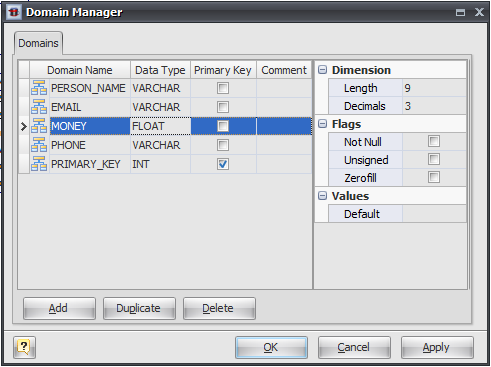
The interface of this dialog is very similar to the Columns tab of the Table Properties editor.
Now you can create domains. Click the Add button to create a domain. Be sure the insertion point is in the first row of the Domain Name column, and then type in the name of the first field, PERSON_NAME. This domain will be used for columns that are intended for storing person names (last and first names) in our database. Select the next cell to use Data Type column. A button with a down arrow appears on the right side of the Data Type column. Select the appropriate data type - VARCHAR. Then set length in the right pane of the dialog to 13.
Add other neccessary domains for other types of the information used in your tables: PRIMARY_KEY, EMAIL, PHONE, etc.
Stage 3. Attaching domains to columns
Now we can attach domains to columns.
Double click on the Employee table and switch to Columns tab. You will see the following dialog:
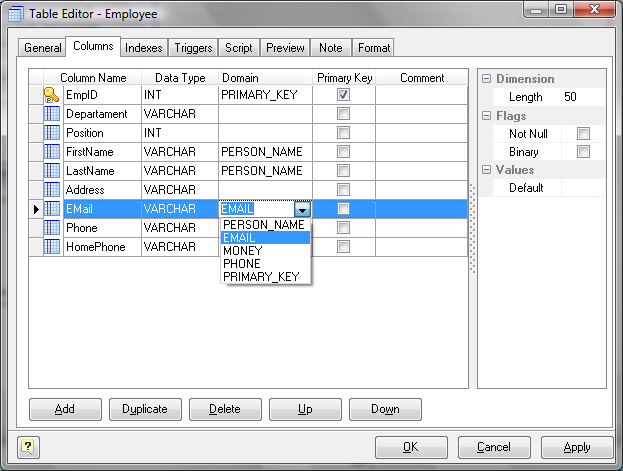
Click on the domain cell near the FirstName column to select the appropriate domain from the list of available diagram domains. Choose the PERSON_NAME domain. Now the FirstName column is domain-based, all changes in the PERSON_NAME domain will bring proper changes in the column. It is possible to consider domains as column templates. Please repeat these actions with the rest of the columns:
| ▪ | attach to the FirstName and LastName columns the PERSON_NAME domain |
| ▪ | attach to the Email column the EMAIL domain |
| ▪ | attach to the EmpID column the PRIMARY_KEY domain |
| ▪ | and so on. |
Click the OK button to commit your changes.
Do the same for the Customers table.
It is quite useful to show column domains within the table boxes on the diagram. Select the Tools | Display Preferences menu item to adjust the Diagram Display Preferences. Go to the Table tab and click on the Domains check box:
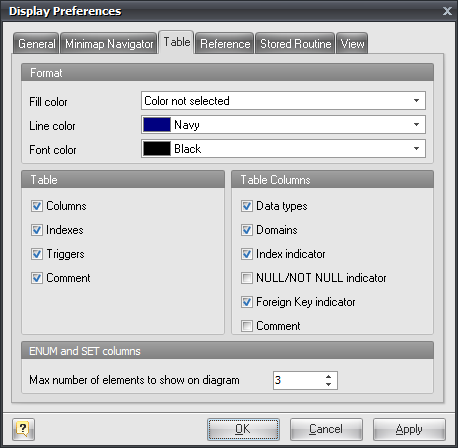
After that you will get the following diagram:
Please note:
You can also attach domain to a column during the column creation.
Suppose, that it is necessary to increase the quantity of chars for storing e-mail addresses.
Again, open the Domain Manager by clicking on the Diagram | Domain Manager... menu item. Click on the EMAIL domain in domains grid. And then increase the Length option (in the right side of dialog) to, say, 60. Click the OK button to store your changes.
Then examine your table columns, that are based on the EMAIL domain: their Length property are changed to the value, that was set for domain.
We have learnt what domains are, how to use them in your diagram design and how they speed up your database maintenance process.
See also:
Tutorial: Creating Your First Diagram